
Instructions To Insert DPF Honeycomb Into Actual Car Exhaust
Insert DPF Honeycomb (Diesel Particulate Filter) honeycomb into an actual car exhaust system is a technical
operation that requires strict adherence to safety standards, vehicle specifications, and mechanical
procedures. Below is a step-by-step guide, but note that professional mechanical expertise and
proper tools are strongly recommended—incorrect installation may damage the exhaust system,
affect engine performance, or even cause safety hazards.
Pre-Installation Preparation– Insert DPF Honeycomb
1.Confirm Compatibility
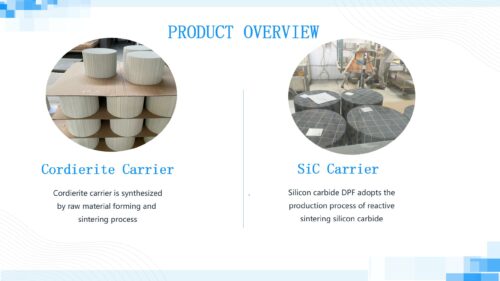
Ensure the DPF honeycomb matches your vehicle’s make, model, and exhaust system specifications
(e.g., size, diameter, cell density). Mismatched parts will fail to function and may damage the
exhaust.
Check if the honeycomb is new or reconditioned (reconditioned units must be properly cleaned and
inspected for cracks or blockages).
2. Gather Tools and Safety Equipment
Tools: Socket wrench set, exhaust sealant (high-temperature, heat-resistant), gaskets (replacement),
wire brush, gloves, safety glasses, jack, jack stands (do NOT rely solely on a jack).
Safety: Work in a well-ventilated area (avoid exhaust fumes), let the exhaust cool completely (it
reaches extremely high temperatures during operation), and disconnect the vehicle’s battery to
prevent accidental starts.
3. Locate the DPF Position
The DPF is typically integrated into the exhaust system, between the diesel oxidation catalyst (DOC)
and the selective catalytic reduction (SCR) system (if equipped). Refer to your vehicle’s service
manual for its exact location.
Step-by-Step Installation Instructions– Insert DPF Honeycomb
Step 1: Remove the Old Exhaust Section Containing the DPF
1. Secure the vehicle on a flat, level surface and use a jack to lift the rear or undercarriage
(depending on DPF location). Place jack stands under the vehicle’s designated support points
for stability.
2. Identify the DPF housing: It is a cylindrical or rectangular component in the exhaust line,
often with sensors (e.g., pressure or temperature sensors) attached to its exterior—disconnect
these sensors carefully (unplug electrical connectors).
3. Loosen and remove the bolts/clamps connecting the DPF housing to the upstream (DOC side)
and downstream (SCR or exhaust pipe) exhaust sections. Use a wire brush to clean rusted
bolts if they are stuck (avoid breaking them).
4. Slide out the old DPF housing or remove it from the exhaust line. If the DPF honeycomb is
replaceable as a separate component (some housings are sealed; others allow honeycomb
replacement), open the housing (if designed to be disassembled) and remove the old
honeycomb (check for signs of damage, such as cracks or ash buildup).
Step 2: Prepare the DPF Honeycomb and Installation Area
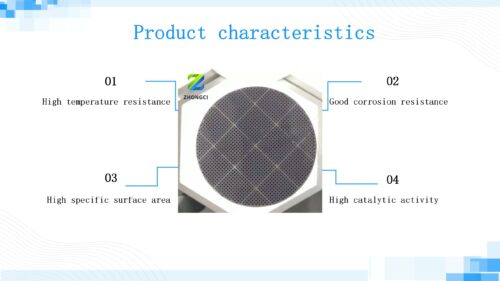
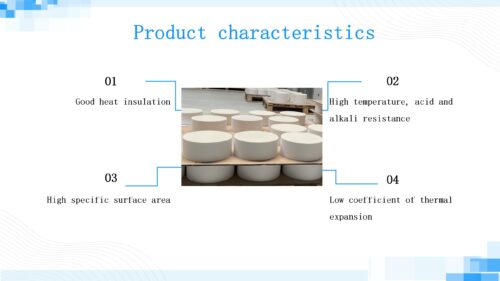
1. Inspect the New Honeycomb
Ensure there are no cracks, chips, or loose material on the honeycomb structure (even small damage
can cause exhaust leaks or reduce filtration efficiency).
Check the dimensions: The honeycomb must fit snugly into the housing or exhaust section without
gaps.
2. Clean the Exhaust Connections
Use a wire brush to remove rust, carbon deposits, or old gasket material from the flange surfaces
(where the DPF connects to upstream/downstream exhaust parts). Clean surfaces ensure a tight seal
and prevent exhaust leaks.
Step 3: Install the DPF Honeycomb
1. Position the Honeycomb
If the DPF housing is reusable, place the new honeycomb into the housing, ensuring it is centered
and seated correctly (some housings have alignment tabs or marks to guide positioning).
If replacing an entire DPF section (honeycomb pre-assembled in a housing), align the housing with
the upstream and downstream exhaust flanges.
2. Install Gaskets and Seals
Place new high-temperature gaskets on the flanges (replace old gaskets—reused ones may leak).Apply a thin layer of heat-resistant exhaust sealant to the gasket surfaces (avoid blocking the honeycomb cells or sensor ports).
3. Secure the Connections
Align the DPF housing/flanges with the exhaust system, then hand-tighten the bolts to ensure proper
alignment (over-tightening immediately may warp the flanges).
Use a torque wrench to tighten the bolts to the manufacturer’s specified torque (typically 20–30 N·m,
but check your vehicle manual—over-tightening can crack flanges; under-tightening causes leaks).
4. Reconnect Sensors
Reattach any pressure, temperature, or oxygen sensors to the DPF housing, ensuring electrical
connectors are fully plugged in (loose connections trigger error codes).
Step 4: Post-Installation Checks
1. Verify Fit and Clearance
Ensure the installed DPF does not contact other vehicle components (e.g., chassis, fuel lines) when
the vehicle is lowered—vibration during driving could cause damage.
Lower the vehicle from jack stands and visually inspect all connections for gaps or misalignment.
2. Test for Leaks
Reconnect the vehicle battery, start the engine, and let it idle. Listen for hissing sounds (indicative of
exhaust leaks) around the DPF connections.
Check for visible exhaust smoke escaping from flange joints (use a piece of paper near
connections—if it flutters, there’s a leak).
If leaks are detected, turn off the engine, let it cool, and retighten bolts or replace gaskets as needed.
3.0 Reset Error Codes (if necessary)
Use an OBD-II scanner to clear any existing DPF-related error codes (e.g., from sensor
disconnection during installation).
Monitor the vehicle’s dashboard for new warning lights (persistent lights may indicate improper
installation or sensor issues).https://www.rtoceramic.com/product/dpf-diesel-particulate-filter-for-pm-exhaust-purification/
4.0 Perform a DPF Regeneration Check (Critical)
After installation, the DPF may require an initial regeneration (burning off residual carbon) to ensure
proper function. This can be done via:
A: Passive regeneration: Drive the vehicle at highway speeds (60+ km/h) for 20–30 minutes to
allow the exhaust temperature to reach 250–500°C, triggering natural regeneration.
B: Active regeneration: If the vehicle has a regeneration button or the ECU initiates it automatically,
follow the manufacturer’s instructions.
Use an OBD scanner to confirm no new error codes (e.g., P242F for DPF restriction) after
regeneration.
Important Notes
Exhaust Leaks: Even small leaks can reduce exhaust backpressure, damage the engine, and
increase emissions. Always fix leaks immediately.
Warranty: Improper installation may void the vehicle or DPF manufacturer’s warranty.
Consider professional installation if unsure.
Maintenance: After installation, monitor DPF performance (e.g., via the vehicle’s dashboard)
and follow recommended maintenance (e.g., regular regeneration, avoiding short trips that
prevent proper heating).
If you lack mechanical experience, consult a certified diesel mechanic or authorized service center to
ensure the DPF honeycomb is installed correctly and safelyhttps://www.chempackings.com/honeycomb-ceramic/cordierite-dpf-honeycomb-ceramic.html